

 - from 1 Unit")
 - from 1 Unit")
 - Li (DORMANT, BARE-ROOTED)")
 - from 1 Unit")
 - from 1 Unit")
 in 50 mm Tube")
 - from 1 Unit")
 - from 1 Unit")
 - from 1 Unit")
 - from 1 Unit")
 - from 1 Unit")
 in 50 mm Tube")
")
Title image above is copyright © The Caledonian Tree Co. Ltd
First published 18th February 2021
Updated on 18th June 2021
Air-Pot containers are the original and the best air-pruning containers around, and here you’ll learn how to get the most out of them!
There are two very important steps that ensure maximum performance: the first is their assembly and the second is their packing.
This just-over two minute long video below covers both these very well, and I’ll follow with some additional words on the packing. Please note that we do not carry all sizes portrayed in this video.
copyright © The Caledonian Tree Co. Ltd
It’s really important that the containers be packed firmly and that the mix fills each and every one of the protruding cones — an Air-Pot® can be packed more densely than conventional pots as the cones ensure that the mix is fully aerated, more so than in conventional pots.
Many people will not have a dedicated potting bench, but as was shown in the video, I strongly recommend filling these containers on a solid surface (no slats) such as a table, bench or even a concrete path. A lot of mix will come through the bottom initially, which is otherwise wasted through slats and onto grass or gravel ground if not able to be retrieved.
As shown here after the repotting shown in the bonsai post!
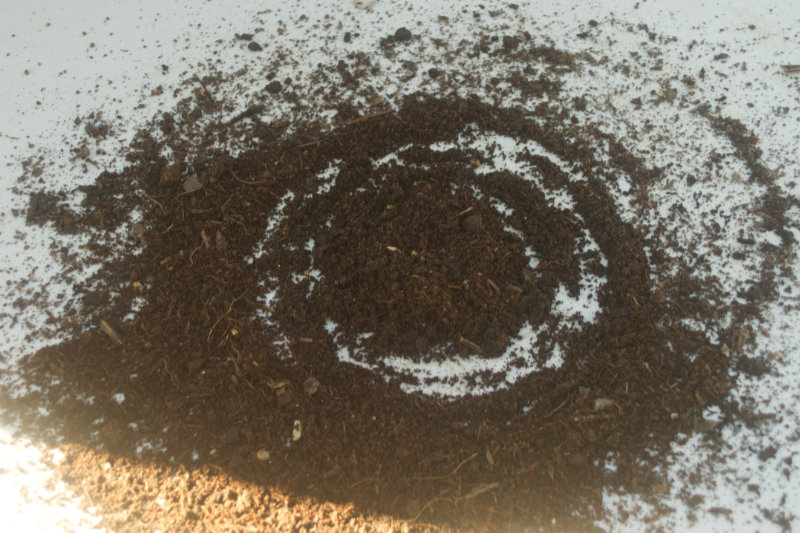
copyright © Optimate Group Pty Ltd
All six sizes we carry can be firmly packed, as demonstrated in the video, by tapping the pot firmly between scoops. But I also find it helpful to run the palm of my hand around the inside as well, between scoops, to really fill those holes. Whatever works for you is the right way if you can see the mix filling those holes — and better still, falling through them! Some settling in the container will still occur over time, especially for the two largest sizes which are definitely the hardest to pack. But this is a good excuse to top up with additional fertilising compost!
Speaking of the mix, the finer it is the better. A particle size under 5 mm is ideal as these can really work their way into every cone. You can use pure compost, or 1-2:1 compost and fine coir (also called coir peat), or even 1:1:1 compost, coir peat and potting mix. Home-made compost may have larger pieces in it, so either pick these out or screen it through mesh before using. I also find that any larger pieces I missed tend to collect in the middle of the container after each firm tap — they sort of bounce out and into the middle as the finer particles move down and across.
Here is a close-up of a 1:1 compost and coir peat mix:
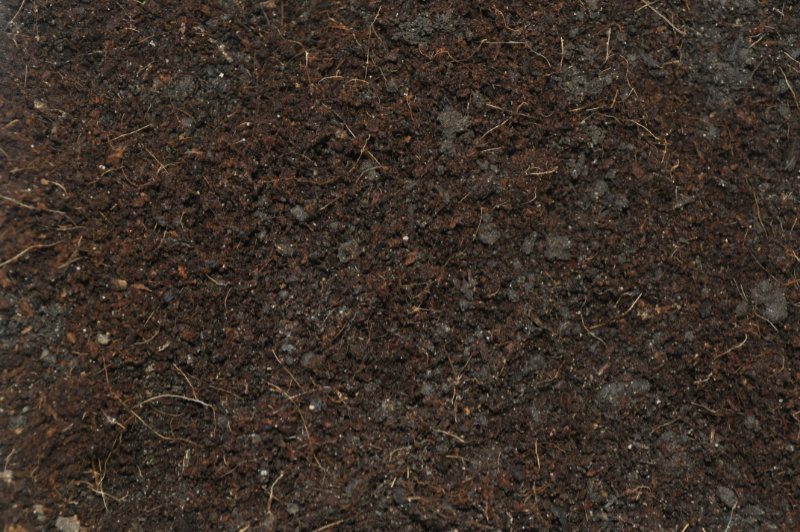
copyright © Optimate Group Pty Ltd
An Air-Pot® can dry out a little quicker than a conventional pot, especially in Australian summers, and if you don’t have a drip-irrigation setup in place, I’d strongly recommend using the next-size container if you find yourself watering more than usual due to obvious plant stress. Do it even if the root system hasn’t filled the container and theoretically isn’t ready for a larger size, as the roots’ water needs are already exceeding what the Air-Pot® is retaining. More often than not this removes stress to the plant completely, so long as you maintain your usual watering regime. I’ve personally observed this for chillies, lemongrass, and the larger herbs. They grew exceptionally well over spring and early summer in the 3 L containers, but maybe too well as water stress was obvious once the summer heat kicked in. Repotting into the 9 L containers solved this problem literally overnight.
I stress that your mileage may differ depending on the species, and in a way this blog is a documentation of my experiences in matching specific species to container sizes so all may benefit. One surprise for me was just how well mints grow in these containers, despite their reputation for liking it very wet! The mints also tend to grow through the cones(!), but I, and customers find that rather appealing!
Drying out is further reduced by using compost and coir.
Compost is organic matter, which is not only nutrient-rich and one reason plants do so well in an Air-Pot®, but it also holds a lot of water. In conventional pots this can be a disadvantage and lead to drainage problems, but the incredible aeration an Air-Pot® allows overcomes this.
The black plastic and warmer Australian climate will still have a drying effect regardless, and the addition of really fine coir does an amazing job in compensating for this.
If you use potting mix, go for the best quality possible. The high quality ones will have slow-release fertiliser and water-holding crystals added to them. The fertiliser will last up to six months so be sure to top up if planting perennials.
I personally don’t use potting mix — this is not a value judgement, just a choice as we make a lot of compost — but while good quality potting mix contains slow-release fertiliser (Osmocote®), coir does not. Thus to compensate for the compost nutrients ‘lost’ to the addition of coir peat I also mix through slow-release PowerFeed® granules.
Osmocote® would work just as well, of course, but I prefer PowerFeed® as it contains soil microbes, which Osmocote® does not. Again, this is not a value judgement, or even an endorsement, and the compost itself will be teeming with plenty of microbes anyway, which makes the whole thing moot. But I have degrees in soil microbiology and fully appreciate what these little fellas do, so if it’s between one with and one without, what’s a soil-microbe-lover gonna do?!
Related Products
 - from 1 Unit")
 - from 1 Unit")
 - from 1 Unit")
 - from 1 Unit")
 - from 1 Unit")
 - from 1 Unit")

Leave a Comment